Showing posts with label hands-on. Show all posts

Tuesday, June 26, 2012

Summer "School"

My post about things our kids learn while on vacation is
available on the Sonlight blog.

Tuesday, February 28, 2012

Ideas for Using Your Book of Time

Today on the Sonlight Blog I'm sharing ideas for making a timeline and using your Book of Time.

Tuesday, December 20, 2011

Pre-Christmas Excitement

Visit the Sonlight Blog to read my post about how to keep your kids occupied during the week before Christmas.

Tuesday, September 27, 2011

Sonlight Core Tips

Visit the Sonlight Blog to read my post about how I developed the Sonlight Core Tips for hands-on ideas.

Wednesday, September 30, 2009

Ideas from Other Sonlighters

For years I've collected links and ideas for supplementing Sonlight. I've posted the ideas I've compiled on my website. (And, yes, it needs to be updated. I'm hoping to work on that soon! Let me know if you have links I could add to it.)

In my blog-hopping this week, I came across a couple of posts from other Sonlighters sharing how they added to their Sonlight adventures in creative ways.
I love that Sonlight has that flexibility built in, so we can add in any extras that are a good fit for our individual families.

We're having a great time with Core 3+4 this year, taking a notebooking approach and adding in lots of library books. I'll be sharing more about our experiences as we go along.


Picture from Sonlight.com.

Monday, May 18, 2009

Sight-Seeing on a Budget

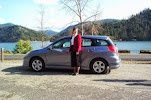
Next month I have 2 homeschool conventions to attend on back-to-back weekends... one in Boise, Idaho and the other in Seattle, Washington. Allowing for travel time, we would only be home 3 days in between, so we've decided to just enjoy some sight-seeing on those extra 3 days!

Several months ago a friend told me about City Pass for Seattle. It is a package of tickets to 6 different attractions for about half price! They allow 9 consecutive days to visit the 6 attractions for that price. (In our case we'll have 3-4 days, but I think we can fit it all in!) So we'll get to visit the Space Needle, the Pacific Science Center, the Museum of Flight, the Seattle Aquarium, Woodland Park Zoo, and take the Seattle Harbor Tour cruise! All of that for just over $50 per person!

What I like about it is that all of those "attractions" are educational as well as fun! You probably couldn't get into an amusement park for one day for that price. This is my kind of sight-seeing!

I didn't realize it when my friend was telling me about it, but I discovered that City Pass is actually available for 10 major cities: Atlanta, Boston, Chicago, Hollywood, Houston, New York, Philadelphia, San Francisco, Seattle, Southern California, and Toronto. So even if a trip to Seattle is not in your future, if you happen to be in one of these other cities and have some time, you might want to check it out!

Tuesday, May 12, 2009

10 Things Your Kids Can Learn While Camping

In our family we like to say that learning is not just for school time, but rather learning is a lifestyle. My husband and I take advantage of opportunities to teach our children as we go about our daily lives.
"You shall teach them diligently to your children, and shall talk of them when you sit in your house, when you walk by the way, when you lie down, and when you rise up."
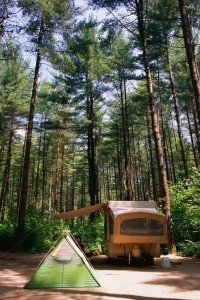
One of our favorite family activities is camping. I posted about our most recent camping trip at Ramblin' Roads... but for this post I thought it would be neat to share a few of the educational benefits we have discovered while camping:
  1. Nature Studies
  2. Survival Skills
  3. Primitive Cooking
  4. Physical Education (hiking, biking, pumping and carrying water...)
  5. Exploration and Discovery
  6. Socialization (They always meet any other kids whose families are camping at the same time!)
  7. Reading (A very relaxing way to spend a lazy afternoon at the campground, when electronics aren't an option!)
  8. Photography
  9. Astronomy
  10. Meteorology
And that's not mention the great family relationships we are building in the process!

What does your family like to do for fun and education?

Wednesday, May 6, 2009

Expanding Attention Spans

"How do you keep the children's attention when you read to them? How do you make sure they are listening and comprehending?"
This is a question parents often ask me, especially about younger children who are just starting school.

My answer: "Let them do something while you read."I think sometimes parents have the notion that the children should be quietly sitting in chairs, with their attention completely focused on Mom in order to listen as she reads. That has not been my experience.

I have been reading to my children for 45 minutes to an hour a day since they were toddlers. My oldest daughter was 3 when I started reading chapter books aloud to her. I had read somewhere that reading aloud to children helps increase their attention spans, so I read to her even when she was wiggling about the room, playing. And you know what? It worked!

I remember one day when she was in 2nd grade the read-aloud was Ginger Pye. It is actually a rather long book for that age group, but I had just allowed the girls (ages 4 and 7) to play quietly as I read each day, not realizing that the 4-year-old, who happens to have learning delays, was even listening. The day after we finished Ginger Pye I showed them the next book on the list.

"Look! We get to start a new book today!"

My 4-year-old was crestfallen. "But! What happened to the doggy?"

She wanted to hear more about Ginger Pye! I was excited to realize she had been following along! Fortunately for her, we happened to have the sequel, Pinky Pye... so yes, we added that in to our Sonlight reading schedule that year!

Over the years my children have enjoyed a wide variety of "quiet" activities while I read to them. Here are just a few of them:
  • drawing pictures, often related to the story
  • practicing handwriting
  • jigsaw puzzles with pictures that tie in with what we are currently learning
  • coloring pages related to the book or historical period (Dover publishes some really great ones!)
  • Legos (When we were reading about Egypt they build a pyramid, with a tiny Lego person wrapped in tissue for the mummy inside!)
My only rule is that they have to be perfectly quiet, therefore they can't work on the same activity together-- otherwise they'll try to whisper.

I have been amazed at how much they retain of what they hear when their hands are busy!

Sunday, May 3, 2009

Finding "something to do"...

With all the "cool" technology available today... as well as opportunities for organized outside activities, sometimes it is challenging to motivate our kids to "find something to do" that does not involve electronics or adult supervision. My girls love The Daring Book for Girls and the sequel, The Double-Daring Book for Girls, as a resource of ideas for all kinds of old-fashioned fun. (There are similar books for boys, The Dangerous Book for Boys, etc.)
Last week the girls asked for permission to try their hand at making a pinata, according to instructions in the book. They know the rule is: If you make a mess, you clean it up... so I gave them permission. I was impressed with their finished product... and so were they! They decided it was so cute they didn't want to cut it open to fill it with candy and then whack it to pieces! They just wanted to look at it!

My older daughter then posted step-by-step instructions, accompanied by pictures she took of the process, on her new blog for teen girls. (That's another activity she has recently taken up, and while it does involve electronics, I encourage it as a fun way to improve her writing skills and learn useful computer skills.)

I'll be curious to see what the girls come up with next. What creative activities have your kids surprised you with lately?

Friday, April 10, 2009

Resurrection Cookies

How do you celebrate Holy Week and Easter in your homeschool? One year, when my children were younger we made "Resurrection Cookies" as a family the night before Easter. It was a meaningful devotional time and the confections were yummy! Here's the recipe we used:

Resurrection Cookies

  • 1 cup whole pecans
  • 1 teaspoon apple cider vinegar
  • 3 egg whites
  • pinch salt
  • 1 cup sugar
  • Plastic Ziploc Baggie
  • Wooden spoon
  • Rolling pin
  • Tape
  • Bible

Preheat oven to 300 degrees. (Do this before doing anything else.)

  • Place nuts in baggie and beat them with a wooden spoon to break into small pieces. Explain that after Jesus was arrested, He was beaten by the Roman soldiers. Read John 19:1-3
  • Open the vinegar and let everyone smell it. Put 1 teaspoon into the mixing bowl. Explain that when Jesus was thirsty on the cross, all He was given to drink was vinegar. Read John 19:28-30
  • Add egg whites to vinegar. Eggs represent life. Explain that Jesus gave His life to give us life. Read John 10:10-11
  • Put a little salt into each person’s hand. Let them taste it, then brush the rest into the bowl. (If you have lots of kids, put a pinch of salt in yourself, and then let each child taste the salt…otherwise there will be too much salt in the recipe) Explain that this represents the salty tears shed by Jesus’ followers, and the bitterness of our own sin. Read Luke 23:27
  • So far the ingredients are not very appetizing. Sprinkle a little sugar into each person’s hand. Let them taste it, then brush the rest into the bowl. Explain that the sweetest part of the story is that Jesus died because He loves us. He wants us to know and belong to Him. Read Psalm 34:8 and John 3:16
  • Beat with mixer on high speed for 15 minutes until stiff peaks are formed. Explain that the color white represents our purity in God’s eyes because our sins are cleansed by Jesus. Read Isaiah 1:18
  • Fold in nuts. Drop by teaspoons onto cookie sheets lined with parchment paper. Explain that each mound represents the rocky tomb where Jesus’ body was laid. Read Matthew 27:57-60
  • Put the cookie sheet in the oven, close the door and TURN THE OVEN OFF. Give each child a piece of tape and seal the oven door shut. Explain that Jesus’ tomb was sealed. Read Matthew 27:65-66
  • Now go to bed. Explain that they may feel sad to leave the cookies in the oven overnight. Jesus’ followers were in despair when the tomb was sealed. Read John 16:20 and 22
  • On Easter morning, open the oven and give everyone a cookie. Notice the cracked surface and take a bite. The cookies are hollow! On the third day, Jesus followers were amazed to find the tomb open and empty. Read Matthew 28:1-9
He is Risen!

Monday, March 16, 2009

Happy St. Patrick's Day!

Myspace Comments

Do you have plans to celebrate St. Patrick's Day in your homeschool? I don't have anything special planned this year... but boy, my friend Farrah @ Light in the Sphere does! She's going all out to celebrate the "wearin' o' the green" with her little boy! Check out her post on how they're going to turn the water green and all sorts of other mischief! Sounds like fun!

Other years we have enjoyed reading about the "real" St. Patrick. One especially good biography is Flame Over Tara. It is part of Sonlight's Core 6 program.

Monday, March 9, 2009

School in a Bag for Toddlers

One question homeschool mothers often ask me is, "What can I do with my toddler while I'm trying to teach the school-age children?" My favorite response: "School in a bag!"

You'll need a nice sturdy box (the kind that copier paper comes in is a great size) and several gallon-size zipper bags. Fill each bag with materials for one activity, and then put your bags in the box. Save this box only for during "school time."

Some of my favorite ideas:

  • A handful of pipe cleaners and some chunky beads or buttons… or if your little one still has a tendency to put things in his mouth, provide a handful of Cheerios or Fruit Loops! 
  •  A small cookie sheet with some alphabet or picture magnets 
  • Touch-and-feel or lift-the-flap books 
  •  Preschool-style jigsaw puzzles 
  •  Inexpensive stickers from the dollar store or just colored dots from an office supply store and a spiral notebook to stick them in. 
  •  Play-dough (It's easy to make your own!) 
  •  Blunt scissors with scraps of construction paper 
  •  Extra-large crayons with a coloring sheet 

The possibilities are endless. You'll probably want to add new bags from time-to-time, and "retire" some for awhile to bring out again later.

 Plop the Little Guy in his high chair with the tray and give him the contents of one bag to play with while you sit at the table and teach your older children. (Note: Take the activity out of the plastic bag before you give it to your child. The bags are just for storage, not to play with.) The high chair helps restrain him and gives him a nice play surface. When he gets bored trade bags with him. If he has a tendency to go through them too fast, set a timer for whatever length of time seems reasonable to you and tell him he gets to trade when the timer goes off. You should have enough bags in your box to keep him occupied for an hour or so by rotating bags with him.

 Have fun with your sweet little one! These years go by very fast!

Friday, March 6, 2009

High School Science

Did you ever wonder how high school homeschool students got their labs done? If you're a homeschooler, you probably already know! In the kitchen, of course!When we were doing Biology we invited a couple other families to join us once a week for the experiments. We dissected an earthworm, a crayfish (which we all persisted in calling a "crawdad"), a perch, and a frog. It was fascinating! The kids were hesitant at first. Just not too sure about cutting into dead animals. But as we progressed they found themselves interested in actually seeing what was inside each creature, and were willing to take turns doing the hands-on parts of the experiments.

Here's a tip about high school sciences. My daughter is not strong in math, so I was not sure what other high school sciences she could do. Both Chemistry and Physics have a prerequisite of Algebra I. My daughter will be doing good to get through Pre-Algebra and Consumer Math by the time she graduates. I knew she would be okay with Biology, but I wasn't sure where to go from there. I had an opportunity to talk to Dr. Jay Wile about it at a homeschool convention. (The Apologia booth was just across the aisle from my Sonlight booth!) Obviously, colleges will be looking for the Chemistry and/or Physics credits, but if that is not a concern, he recommended Astronomy and Advanced Biology, and then maybe even Marine Biology if we have time. I was surprised about Advanced Biology. I figured Chemistry would be a prerequisite for that, but he said no, the only prerequisite was Biology I. That was encouraging to me!

Monday, March 2, 2009

Hands-On Learning for the Not-So-Crafty Mom

My approach to homeschooling is to keep things as simple as possible. However, there's no denying that kids love to do things with their hands, some more than others. Rather than invest in pre-packaged "hands-on" curriculum, I have chosen to take a more natural approach. I provide my children with a variety of construction toys (Basic LEGOs , Lincoln Logs, K'nex , Playmobil, etc.) and allow them to "play" with them while I read to them. I used a literature-based curriculum with a lot of reading, and I discovered my children listen better if their hands are busy. Often they will build something that goes along with what they are learning!

I also keep a cupboard stocked with arts and crafts supplies. (Shop in August for back-to-school specials and buy enough glue, crayons, markers, construction paper, etc. to last the rest of the year.) They have to keep it at the table, but I allow my children to come up with their own craft projects to supplement school work, or just for fun when chores are done.

If your children enjoy coloring I highly recommend the quality educational coloring books published by Dover. Or do a search online for "printable coloring sheets." I have found some really nice ones that way, as well.

  © Free Blogger Templates Spain by Ourblogtemplates.com 2008

Back to TOP